Today’s guide will walk you through How to edit a dashcam video.
About three months ago, a 3-minute video clip went viral on YouTube. It was a clip showing a crew in an armored vehicle, caught in a brazen highway chase, with armed robbers firing from all angles.
The driver maintained a stoic level of calmness and expertly evaded the assailants. Every moment and every reaction from both the driver and his wingman was captured, thanks to the dashboard camera (a.k.a dashcam)!
Now, you may not be in the frontlines of highway drama, but if you have a dashcam, then you’re pretty interested in capturing moments behind the wheels.
Dash cams are useful for recording road trips, compiling insurance evidence, making police reports, etc.
In any case, you’d find that raw dash cam footage is usually full of redundant frames, sensitive audio, and stuff you’d rather get rid of.
So, in this guide, we will show you how to edit dashcam videos for free, so you can share only stuff that’s worth sharing!
Contents
5 Best Dash Cam Video Editors for Windows 10/11
Ever since the demise of Windows Movie Maker, there have been several alternative video editors on the internet helping people edit videos conveniently.
In this section, we will pay attention to some of the best video editors you can use if you’d like to master How to edit a dashcam video for free. Let’s get to them!
Animotica

Let’s begin with our favorite on the list! Animotica is a beginner-friendly Windows 10/11 video editor packed with super-exciting features.
Whether you just want to trim or merge a video, or want to carry out a full-blown post-production task, Animotica has everything you need to get the ball rolling!
Some of the cool stuff you can do with Animotica include transitions, green screen effects, Ken Burns, 3D LUTs, sound editing, and much more!
Hit the button below to get started for free. Be sure to use the promo code DashCamWithAnimotica2021 so we’ll know where you came from ?.

Microsoft Photos

M.S Photos may sound like it’s just a picture management app, but it’s actually more than that. Following the removal of Windows Movie Maker, Microsoft fitted Photos with basic video editing features.
With this inbuilt app, you can trim, merge, and split your videos. It allows you to also add music and captions to make your videos a little better.
Avidemux

This is an open-source video editor with basic video editing features. Its major strength lies in its compatibility with several file formats, including ASF, AVI, MP4, and more.
It is available for all major Operating Systems, including Windows, Linux, and macOS.
While the interface may not be as intuitive as you’d like, it really does the job.
VideoPad

Next on our list is VideoPad. VideoPad is popular for its fast video stream processing. It supports all video formats and comes with over 50 transition effects.
However, the free version is only available for ‘non-commercial’ use. Thus, not all of its features are available for free.
VideoLAN

Finally, we have VideoLAN. VideoLAN belongs to the owners of the popular media player, VLC. It is a simple video editor with a clean interface, making it great for beginners.
The software is also an open-source project, which means that new features will be added to it by its community of users from time to time.
How to Edit a Dash Cam Video in Windows 10/11
In this section, we’ll go through the exact steps you need to take to edit a dashcam video in Windows 10/11.
We will be demonstrating this with our video editor Animotica. So, if you’ve not installed it already, hit the button below to get started for free! Be sure to use the promo code DashCamWithAnimotica2021 so we can know where you’re coming from!
Step 1: Launch Animotica and Create a New Project
Double-tap on Animotica to launch it. Once you get to the home screen, select New Project as shown below.

This will take you to the project window, where you can begin the editing process.
Step 2: Upload Your Dash Cam Video
Hit on Add Video/Photo Clips to begin. Select the same option from the pop-up drawer as shown below.

Now, navigate through your local storage and select the video you’d like to edit.
Step 3: Edit Your Video
At this point, there are several things you can do to your video to make it ‘pop.’ But we’ll walk you through the basics. Let’s go!
Trim Your Video
The trim feature is helpful if you want to just get rid of the beginning or ending part of your video.
Simply tap on the video’s thumbnail to reveal the core editing options. Next, select Trim.

You can trim from the start or trim from the end, as shown above. Similarly, you can just use the trim slider to trim on your own terms.

Remove Specific Part of the Video
Animotica allows you to get rid of specific scenes from your dashcam video using a combination of the split and trim tools.
First, drag your time slider to the starting point of the scene you want to delete. Next, tap on the video thumbnail and click on split.

Now, you have two clips. The one with the orange square contains the scene you want to delete. Next, drag the slider to the ending point of the scene. You can use the Twist Control feature for a more precise selection.

Now, select Trim and hit Trim from Start.

This will effectively get rid of the scene. Repeat this process for any other scene you want to delete.
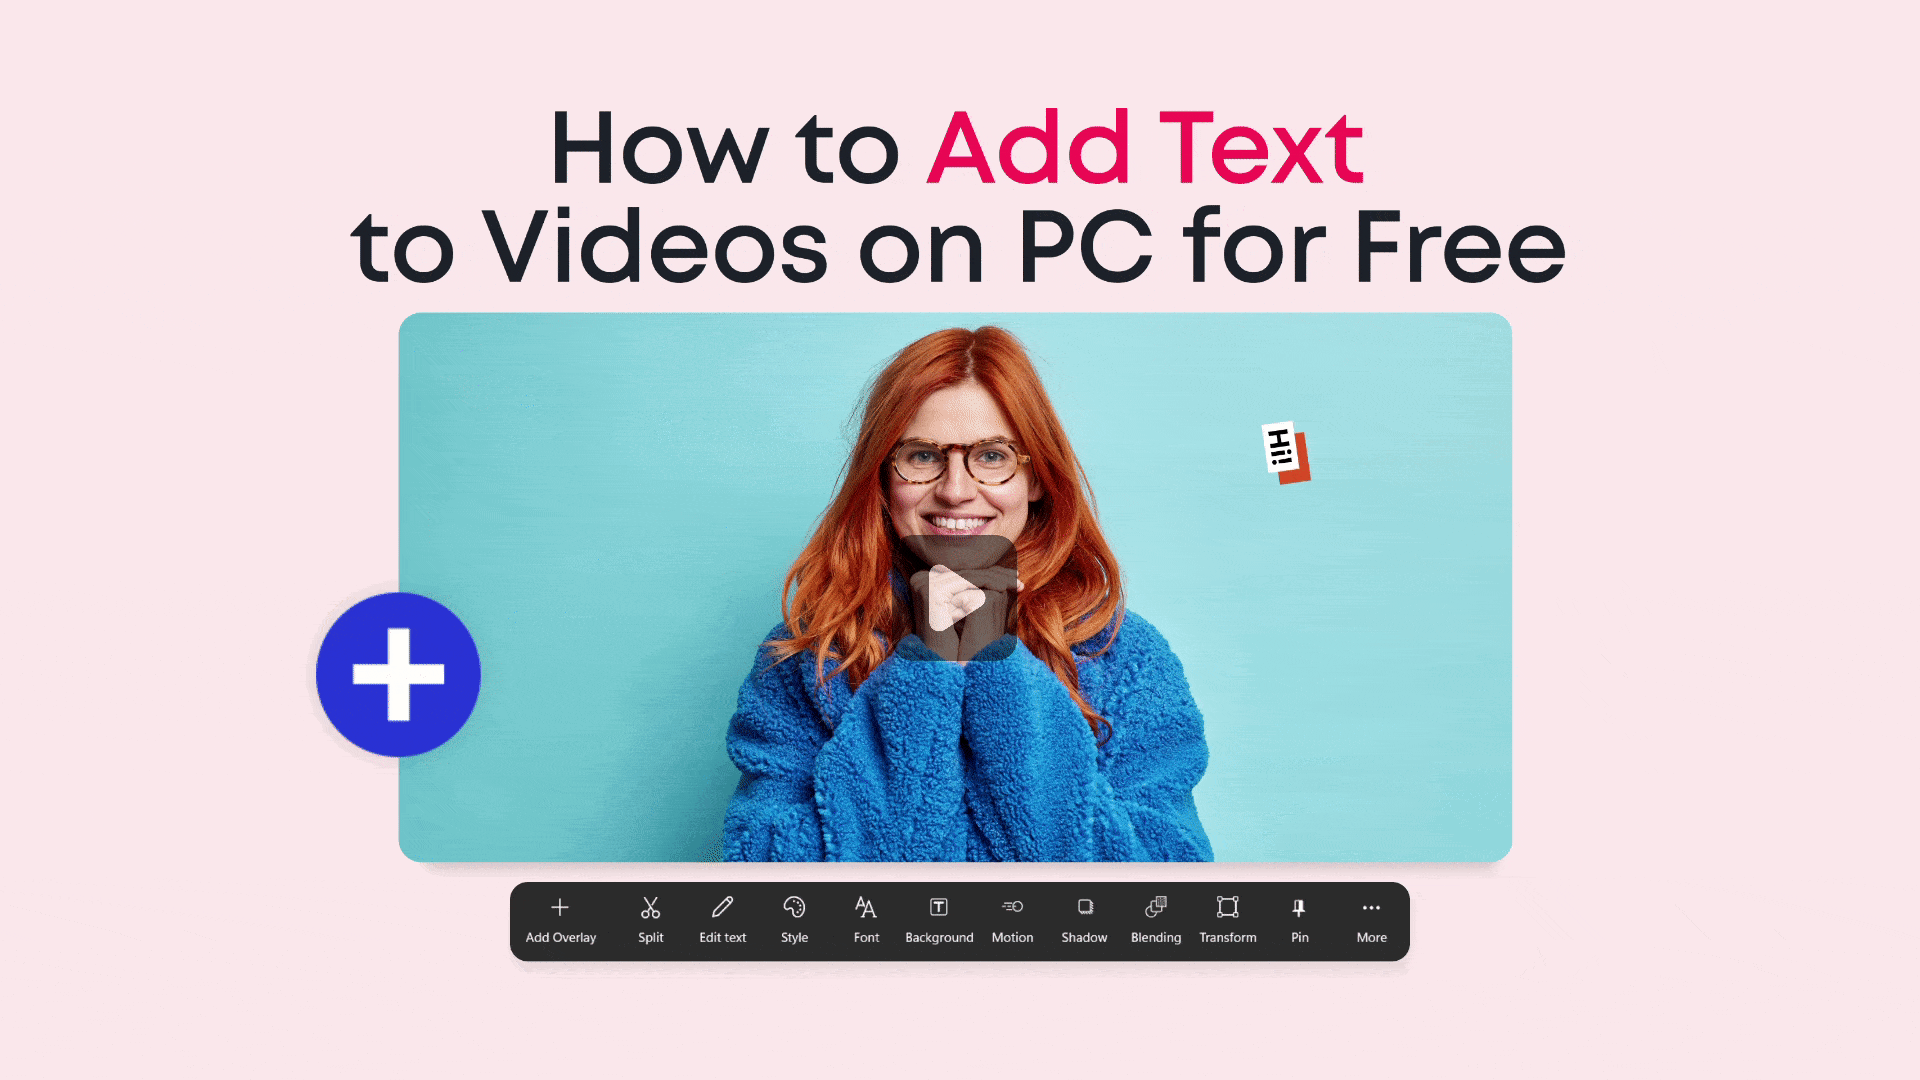
Add Text
Texts can help explain a scene or give it a clearer context. For example, you can include location, time, car brand, etc., to illustrate the situation better.
To add texts to your video, click on Add and select Text.

Write what you want and hit X. You can adjust the size by dragging one of the knobs attached to the text box.

There’s a lot you can do to make your texts look so much better. You can add shadows, motion, blending, change fonts and style, etc. Here’s a guide on how to work with texts.
Freeze a Scene
Freezing a scene is important when you want to emphasize a particular aspect of a story. Perhaps you want to point out a car’s plate number or an interesting sight along the road. Whatever the case, it takes just a couple of seconds to freeze a frame in Animotica.
First, locate the frame you’d like to freeze by dragging the time slider to the position on the timeline. Recall that you can use the twist control feature for this as well.
Next, tap on the thumbnail of the clip that has the frame you’d like to freeze. Hit Snapshot and select Freeze Frame.

You’d notice that an extra clip would appear. The frozen frame would be the one with a duration of 4 seconds. You can adjust the duration by tapping on the time indicator (00:04). Also, since it’s now a clip of its own, you can add texts, GIFs, stickers, and more to it.
Add GIFs and Stickers
You can use GIFs like animated arrows, circles, etc., to highlight specific elements on your clip.
To do this, simply drag the slider to the point where you’d like to add the GIF or sticker. Let’s select the frozen frame for this example. Now, hit on Add and choose GIPHY.

Now, you can select from GIPHY’s library of GIFs and stickers.
Once you’ve selected your GIF, you can adjust the position by dragging it around. You can also reduce or extend its duration by stretching or compressing the blue bar.

If your GIF has an obstructive background, you can get rid of this background using the Chroma Key function.
Simply tap on Chroma and flip the Chroma Key Effect switch. Next, hit on the green ball as shown, tap on your GIF’s background, and hit X!

Merge with Another Clip
Dashcams usually record in segments of 5 minutes. This means that after recording for five minutes, it might break off into a new recording. Thus, to give a complete story, you might want to merge all these separate videos.
With Animotica, it’s easy!
Just hit on Add and select Video or Photo Clips.

This will take you to your storage area where you can find and upload your second video. Repeat this for all the videos you want to merge!
To save the video, go on to step 4.
Step 4: Save Video
Now that we’ve done all the basic editing functionalities, we can go ahead and save the video.
To begin, select, Export Video. This will take you to the export window. Feel free to leave all the parameters as they are and hit Save As.

Next, enter your desired filename, and hit Save.
You can now sit back and grab a cup of coffee while the editor takes care of the rest!
Conclusion
That’s it! You’ve just successfully turned your first dashcam footage into a shareable masterpiece.
Did you run into issues? Have any questions? Be sure to send us a message and we’ll be here to assist you!
Cheers!